

OnePlus 8 FRP is a easy process. You can easily bypass google account verification from your OnePlus 8 without using any PC. If your device is stuck on the google account verification screen then this article will be a great help for you.
Bypassing FRP from OnePlus 8 is a very straightforward process. You just need an another android device. There’s no need of a PC or laptop. So, are you ready to regain access to your OnePlus 8. Read the full article and follow each and every step.
Steps to Bypass FRP on OnePlus 8
- At first, Turn on your OnePlus 8.
- Now tap on -> and connect your device with Wi-Fi.
- Now you will see a Google Verification screen.

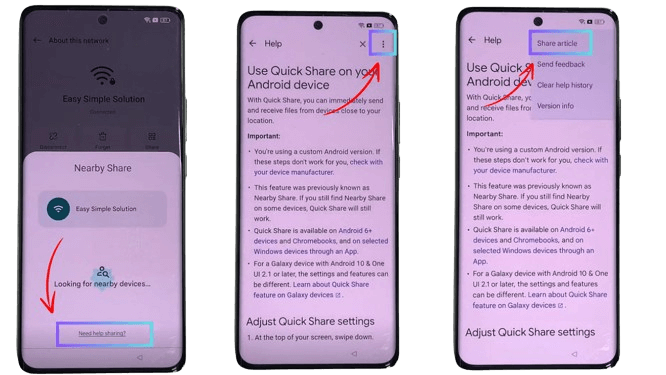
- Go back to the Wi-Fi connection Page.
- Now tap the Wi-Fi network which your device is connected with.
- After that tap on the share button.
- Now a popup will appear. Click on the Nearby Button.

- Now you will see a Need Help Sharing? option click on it.
- After tap on the 3 dot button the top right corner of the screen and select Share article.
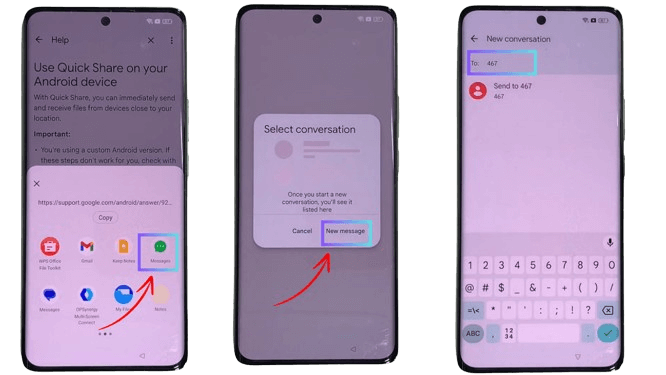
- Now select the Messaging App.
- Tap on New Message.
- Now type any random number in the ‘To’ Section.
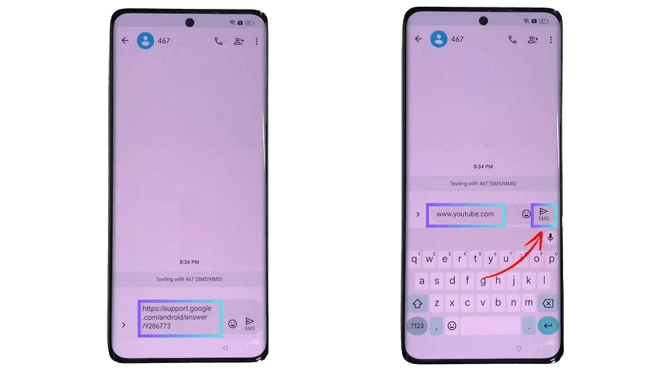
- Now you will see a automatically inserted link in the message tab.
- Clear the link and replace it with www.youtube.com.
- Click on Send.
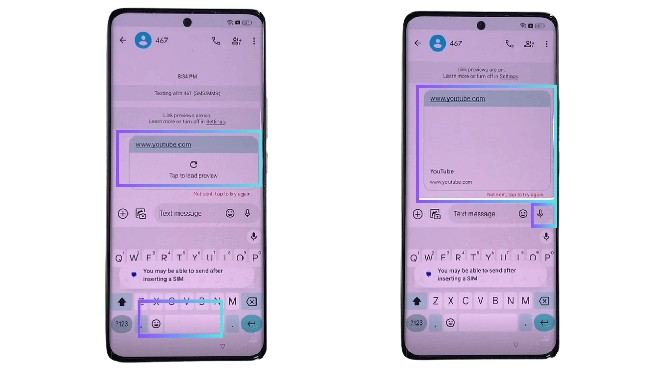
- Click on the YouTube logo.
- Now you will be redirected to YouTube App.
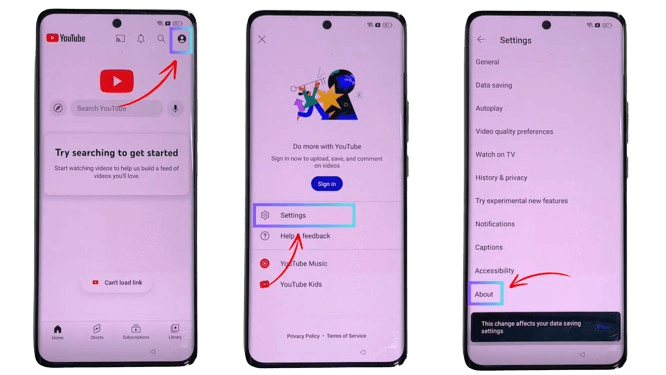
- On the YouTube App click on the User Icon on the top right corner.
- Now Tap on Settings.
- After tap on About option.
- Click on ‘YouTube Terms of Service’.
- Now Chrome App will opened.
- Select Use without an account.
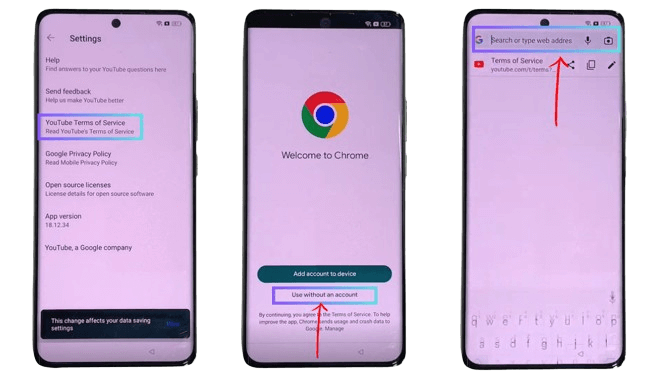
- Now on the search bar type ( dvfever) to open FRP Device Shortcuts.
- From the shortcuts list Click on Setting option.
- Your device settings app will opened.
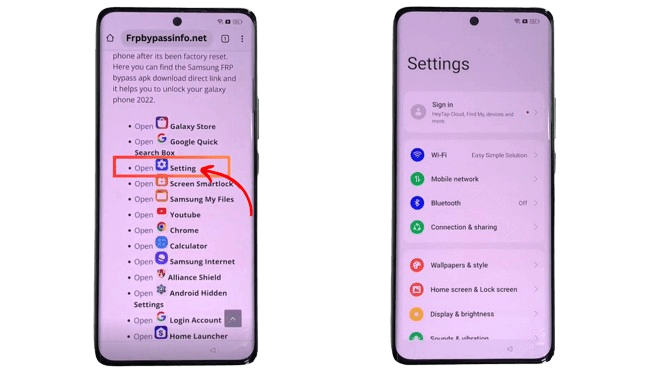
- In the settings app scroll down and Tap on ‘Home screen & Lock Screen’.
- Now tap on ‘Home Screen Layout’.
- Your device home screen will opened.
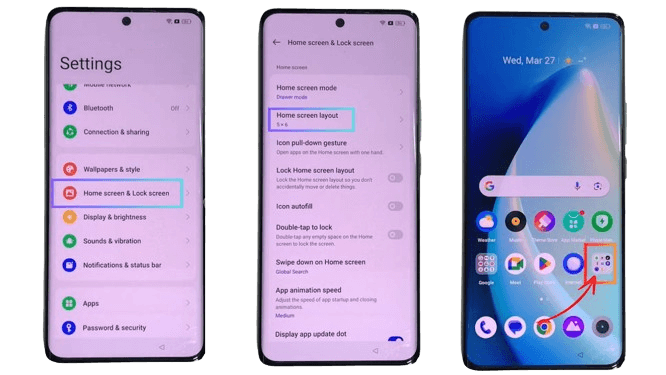
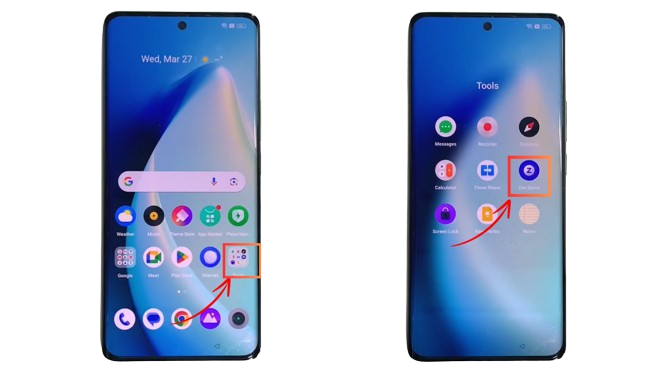
- Now Open your device Tool Folder.
- In the tool folder search for “Clone Phone” application.
- Tap to open it.
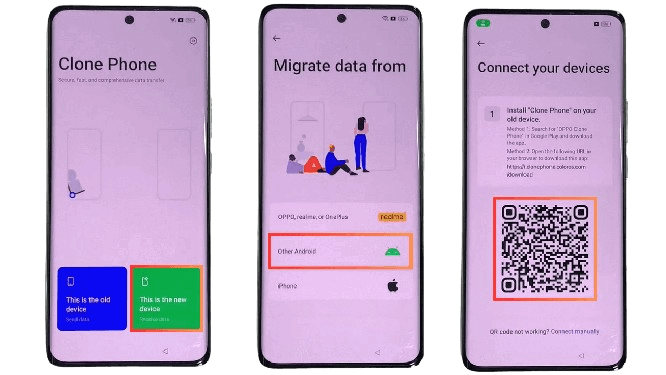
- Now “Clone Phone” Application will opened.
- Allow all the permissions the app asked for.
- Now tap on This is the new device.
- Select Other Android.
- Now a QR Code will appear on your device secrren.
Now you will need an Another Android device
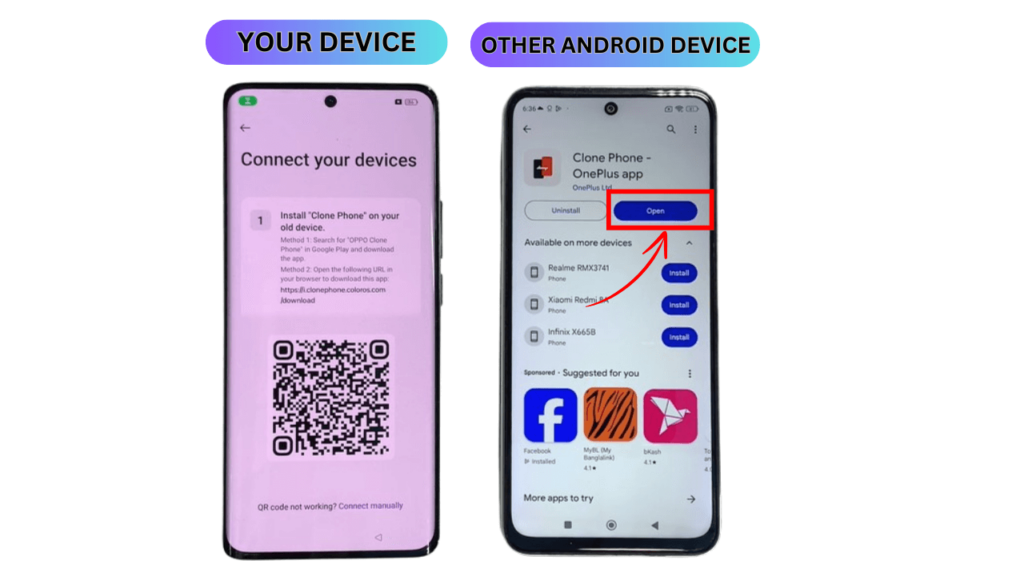
- In the other android device open Play store.
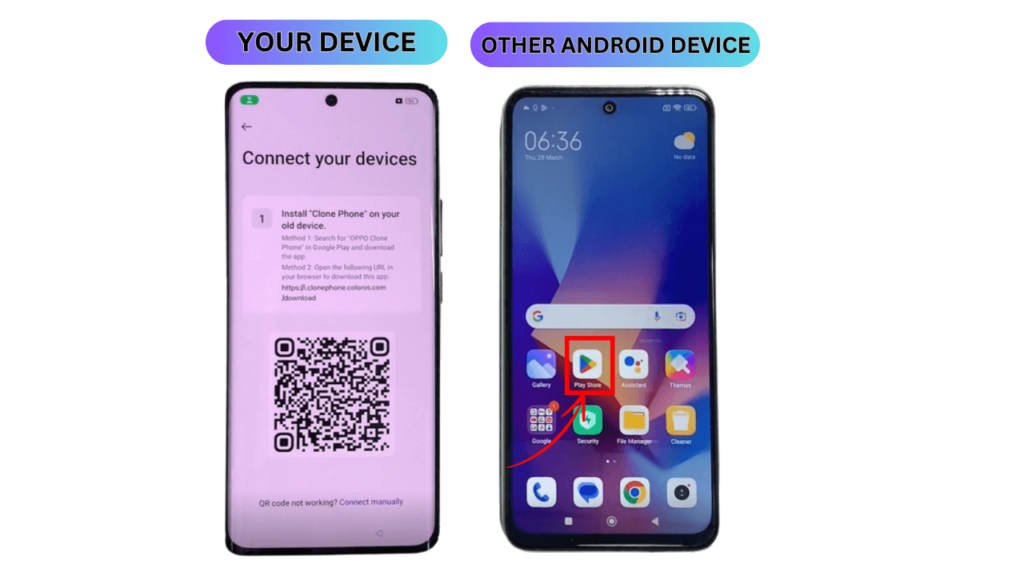
- Now search for Clone Phone App.
- Download and Install the app.
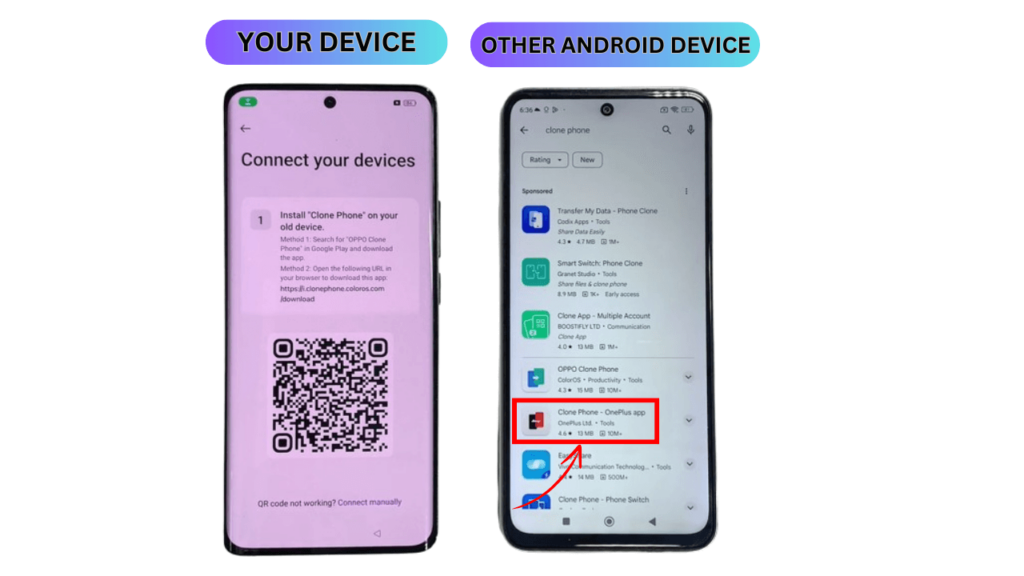
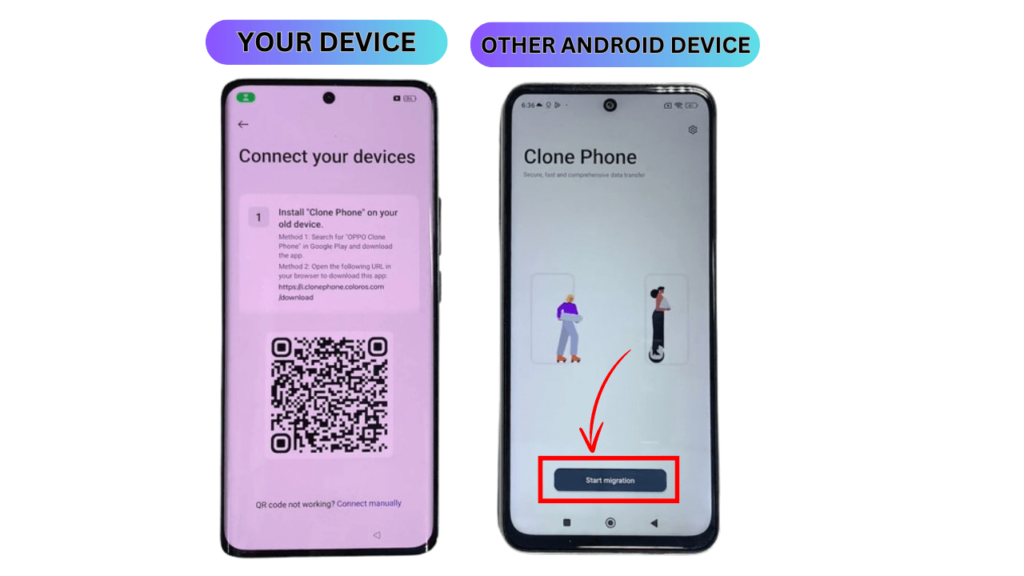
- Now open the app on the device.
- Click on Start Migration Option.
- Allow all the permissions the app asked for.
- Allow Permit usage Access.
- A QR code scanner will be opened.
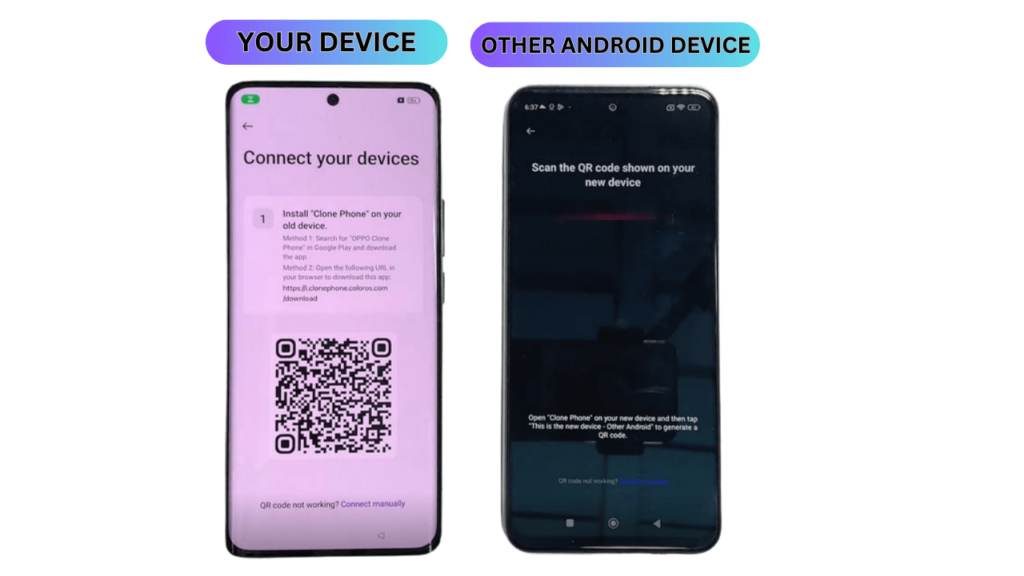
- Now scan the FRP enabled device QR code with your Other Android Device.
- Both devices are now connected successfully.
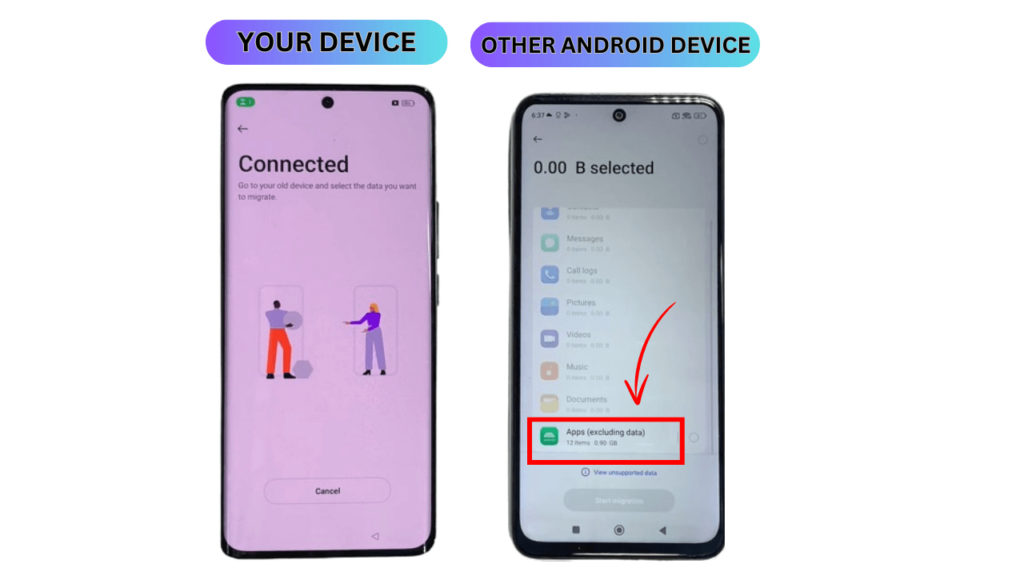
- Now click on “Apps Including (data)” and untick all.
- Select any application from the list.
- I have selected Facebook app. It’s your choice to choose any app.
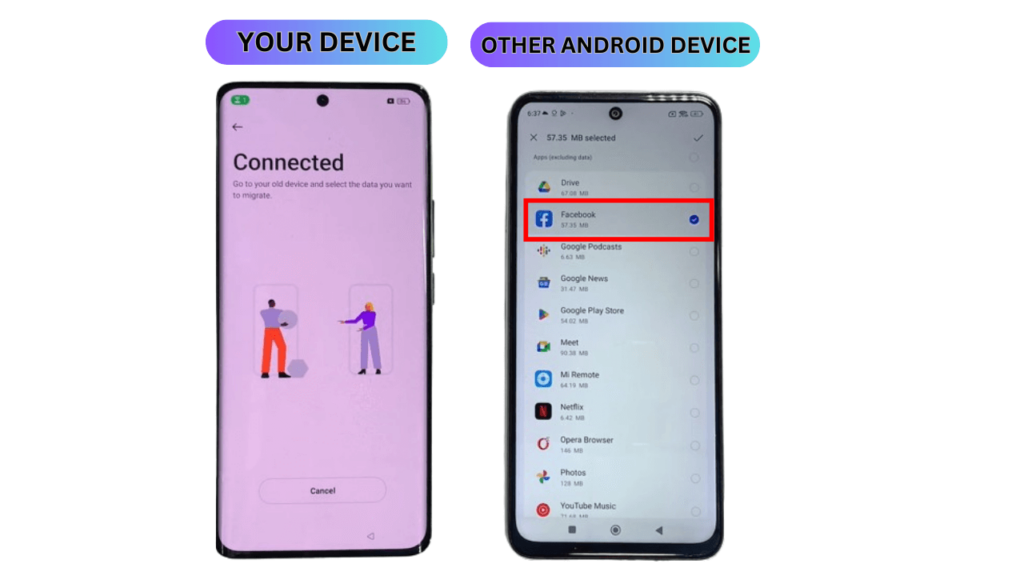
- Click on Start Migration.
- Now the app you have selected will be transferred to the FRP enabled device.
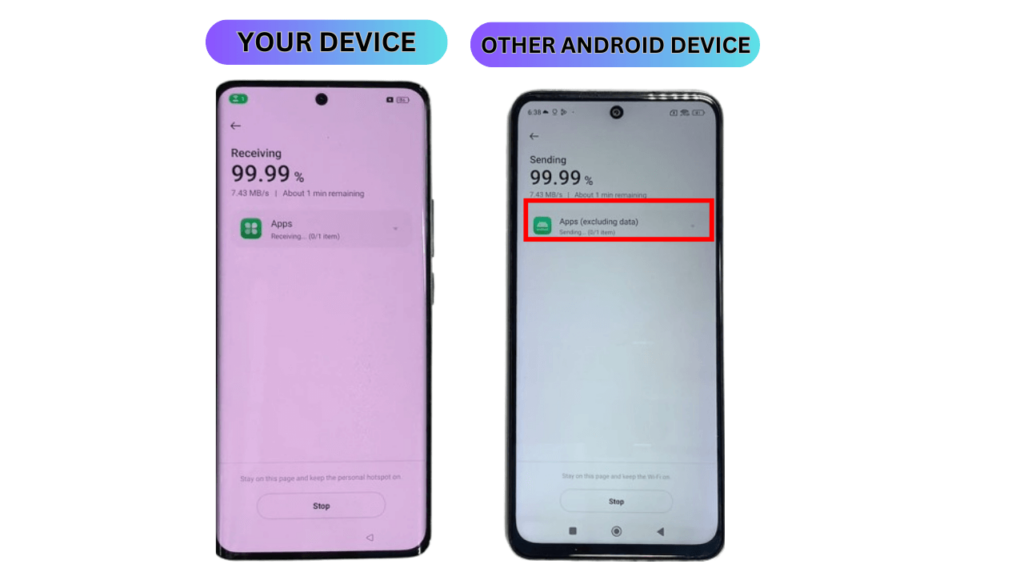
- Wait for the Migration process to complete.
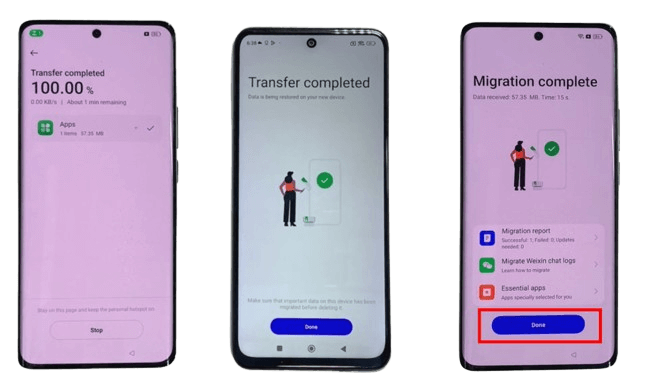
- After disconnect both the devices.
- Now on the FRP enabled device click on done.
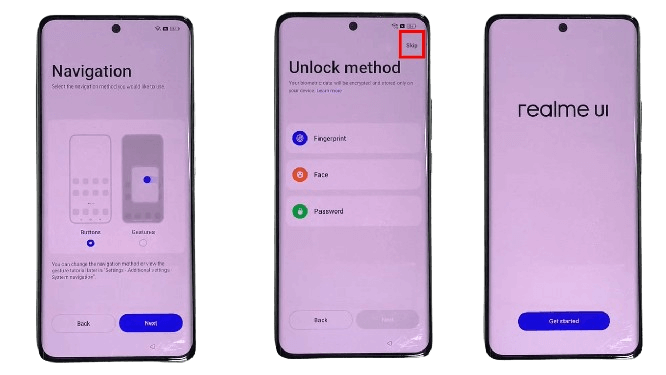
- Now you have to select the navigation.
- Tap Skip on the Unlock Method Screen.
- Now setup some initial steps.
- Congratulations, You have successfully removed FRP from your OnePlus 8 Android Smartphone.